How to Save Seeds From Your Favorite Garden Plants
46 views
A thriving garden doesn't have to start with a trip to the garden center every spring. If you've grown vegetables, herbs, or flowers that performed especially well, saving their seeds lets you carry those successful plants into the next growing season. It's rewarding, budget-friendly, and a practical way to preserve varieties that thrive in your local climate.
The process is easier than many beginners expect, but a few simple rules make all the difference. Knowing which plants produce reliable seeds, when to harvest them, and how to store them properly helps ensure strong germination next season. This guide walks you through every step so you can confidently build your own seed collection.
What Is Seed Saving?
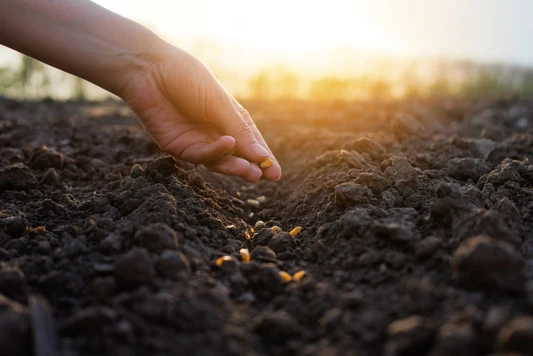
Seed saving is the practice of collecting mature seeds from healthy plants so they can be planted in future seasons. Gardeners have relied on this technique for generations to preserve favorite varieties and reduce the need to buy new seeds every year.
The best results come from open-pollinated and heirloom plants because they generally produce offspring with characteristics similar to the parent plant. Hybrid (F1) varieties often produce seeds that grow into plants with unpredictable traits, making them less suitable for beginners interested in consistent results.
Why Saving Seeds Is Worth It
Saving seeds offers more than just financial savings.
Some of the biggest benefits include:
Reduces the cost of purchasing seeds each season.
Preserves favorite plant varieties that may become difficult to find.
Gradually develops plants adapted to your local growing conditions.
Supports biodiversity by maintaining diverse plant genetics.
Gives gardeners greater independence and self-sufficiency.
Many gardeners also find that growing plants from seeds they've collected themselves creates a stronger connection with their garden from one season to the next.
Choose the Right Plants First
Not every plant is equally easy to save seeds from. Beginners should start with crops that naturally self-pollinate because they're less likely to cross with nearby varieties.
Excellent beginner-friendly plants
Plant | Difficulty | Notes |
|---|---|---|
Beans | Easy | Let pods dry completely on the plant. |
Peas | Easy | Harvest fully dried pods. |
Lettuce | Easy | Collect after flowers produce fluffy seed heads. |
Tomatoes | Easy | Requires a simple fermentation step. |
Peppers | Easy | Allow fruits to fully ripen before collecting seeds. |
Basil | Easy | Harvest dried flower spikes. |
Plants that require extra care
Some plants cross-pollinate easily, meaning insects or wind can carry pollen between different varieties.
Examples include:
Squash
Pumpkins
Cucumbers
Melons
Corn
Carrots
Brassicas such as cabbage and broccoli
These plants often require isolation distances or controlled pollination if you want seeds that remain true to type.
Always Start With Healthy Plants
The quality of your seeds begins long before harvest.
Select plants that are:
Free from diseases
Free from serious insect damage
Vigorous and productive
Typical of the variety
Producing the flavor, size, or color you want to preserve
Avoid collecting seeds from weak or unhealthy plants, as undesirable traits may be carried into future generations.
How to Save Seeds Step by Step
1. Let the seeds fully mature
One of the most common beginner mistakes is harvesting too early.
Many vegetables are picked long before their seeds mature. If your goal is seed saving, leave selected fruits or seed pods on the plant until they're completely ripe—or even slightly overripe in some cases.
For example:
Tomatoes should become fully ripe.
Beans and peas should dry on the vine.
Lettuce should flower before producing seed heads.
2. Harvest at the right time
Choose a dry day whenever possible.
Moisture during harvest increases the risk of mold during storage.
Collect:
Dry pods from beans and peas.
Mature flower heads from herbs and flowers.
Fully ripe fruits for tomatoes, peppers, cucumbers, and squash.
3. Clean the seeds
Cleaning methods depend on the type of plant.
Dry seeds
Plants like beans, peas, lettuce, basil, and many flowers simply need their seeds separated from pods, husks, or dried flower heads.
Brush away any remaining plant material.
Wet seeds
Tomatoes, cucumbers, squash, and peppers require removal from fleshy fruit.
Tomatoes benefit from a short fermentation process that removes the gel coating surrounding each seed. After fermenting for a few days, rinse the seeds thoroughly before drying.
4. Dry the seeds completely
Proper drying is one of the most important steps.
Spread seeds in a single layer on:
Paper plates
Coffee filters
Fine screens
Paper towels
Allow good air circulation and keep them out of direct sunlight.
Depending on humidity and seed size, drying may take several days to two weeks.
Seeds should feel hard and snap cleanly rather than bend before storage.
How to Store Seeds Properly
Even perfectly harvested seeds lose viability if stored incorrectly.
The ideal storage environment is:
Cool
Dry
Dark
Paper envelopes work well for organizing individual varieties. Many gardeners then place those envelopes inside airtight jars or containers to provide additional protection from humidity.
Always label each packet with:
Plant name
Variety
Collection date
Any useful notes
A refrigerator maintained at low humidity provides excellent long-term storage for many common garden seeds.
Common Mistakes to Avoid
Even experienced gardeners occasionally lose seeds because of simple oversights.
Avoid these common problems:
Saving seeds from hybrid plants expecting identical offspring.
Harvesting seeds before they're fully mature.
Storing seeds before they're completely dry.
Forgetting to label varieties.
Saving seeds from diseased plants.
Ignoring cross-pollination in crops that readily cross with nearby varieties.
Storing seeds in warm garages or damp sheds.
Small improvements during harvesting and storage often make a noticeable difference in germination rates the following year.
Best Practices for Long-Term Success
As your seed collection grows, a few habits will help keep everything organized.
Save seeds every season rather than relying on older stock.
Keep separate containers for vegetables, herbs, and flowers.
Rotate older seeds first.
Periodically test older seeds with a simple germination test using a damp paper towel.
Keep detailed notes about plant performance each season.
Over time, you'll build a collection of seeds that perform well under your own growing conditions.
Which Seeds Are Usually Easiest to Save?
Here's a quick comparison for beginners.
Plant Type | Collection Method | Beginner Friendly |
|---|---|---|
Beans | Dry pods | ⭐⭐⭐⭐⭐ |
Peas | Dry pods | ⭐⭐⭐⭐⭐ |
Lettuce | Mature seed heads | ⭐⭐⭐⭐☆ |
Basil | Dried flower spikes | ⭐⭐⭐⭐☆ |
Tomatoes | Ferment, rinse, dry | ⭐⭐⭐⭐☆ |
Peppers | Scoop and dry | ⭐⭐⭐⭐☆ |
Cucumbers | Wet seed cleaning | ⭐⭐⭐☆☆ |
Squash | Wet seed cleaning | ⭐⭐☆☆☆ |
Starting with easier crops helps build confidence before trying plants that require more attention to pollination.
Expert Tips for Better Seed Saving
A few simple techniques can noticeably improve your results.
Mark your healthiest plants early in the season so you don't accidentally harvest them for eating.
Harvest only during dry weather whenever possible.
Handle dry pods gently, as some split open easily once fully mature.
Store seeds in small batches instead of mixing varieties.
Keep a notebook or digital record of where each seed came from and how well it performed.
These habits become especially valuable as your collection expands.
Frequently Asked Questions
Can I save seeds from grocery store vegetables?
Sometimes, but results vary. Produce may come from hybrid varieties or plants grown in different climates. Seeds from open-pollinated vegetables generally provide the most predictable results.
How long do saved seeds remain viable?
It depends on the species and storage conditions. Many vegetable seeds remain viable for several years when stored in cool, dry, dark conditions, although germination rates gradually decline over time.
Should I refrigerate my seeds?
For many home gardeners, refrigeration is an excellent option because it provides a consistently cool environment with stable temperatures. Just make sure seeds are completely dry before storing them.
Why didn't my saved seeds grow?
Poor germination is often caused by immature harvesting, incomplete drying, excessive moisture during storage, or simply old seed age. Proper collection and storage greatly improve success.
Can flowers be saved the same way as vegetables?
Many annual flowers, including marigolds, zinnias, sunflowers, and cosmos, produce seeds that are just as easy to collect as many vegetables. Wait until the flower heads dry naturally before harvesting.
Grow Next Season From This Year's Success
Saving seeds is one of the simplest gardening skills to learn, yet it delivers lasting rewards. A handful of carefully collected seeds can preserve your favorite vegetables, herbs, and flowers while reducing gardening costs and helping maintain locally adapted plants.
Begin with easy, open-pollinated varieties such as beans, peas, tomatoes, or basil. Harvest only mature seeds, dry them thoroughly, and store them in cool, dry conditions. With each growing season, you'll gain confidence, build a personalized seed collection, and enjoy the satisfaction of starting new plants from the garden you've already nurtured.
seed saving
heirloom seeds
garden seeds
plant propagation
gardening
Found this helpful? Share it!